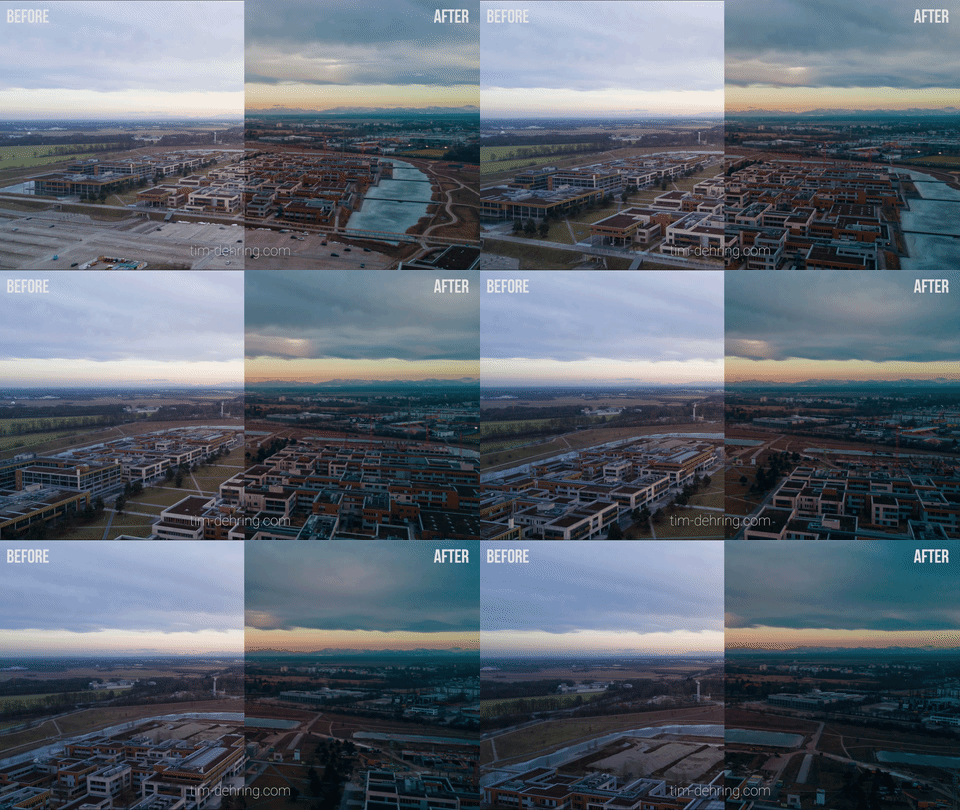
What is a dronelapse?
The name Dronelapse derives from the English word “hyperlapse”. A hyperlapse is a timelapse with a moving camera. A timelapse is a sequence of pictures, which were made with a constant interval and than have been put together to a film. Drones are perfect for moving timelapses, because they can move independently.
My dronelapse test:
22zweizwei Dronelapse:
1. Set up the drone for a dronelapse
For filming a dronelapse, the drone must fly a track for a longer time, with constant speed. As it is very difficult to do this manually with the controller, you are better off with the waypoint function.
DJI UAVs like the Mavic Pro, Phantom or Inspire have this function built in the app. The alternative app Litchi also works for waypoints. The app’s biggest advantage is that you can program the waypoints on ground, before the flight.
Set up the foto mode
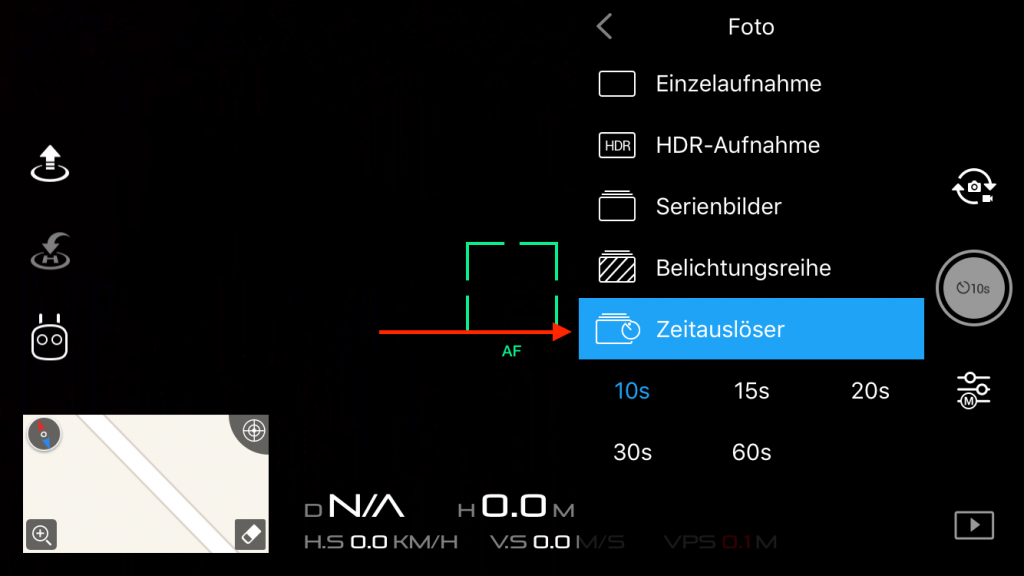
Set the drone into the intervalmode. Think about which interval between the single pictures makes the most sense.
For example: clouds are moving slowly -> longer intervals between pictures
cars are moving faster -> shorter intervals between pictures
I prefer DNG pictures because I have more possibilities in the color grading. The shortest interval with DNG at the DJI drones is 10 seconds. If you use Jpegs instead, you have 2 seconds. If you don’t need RAW files you can also shoot in video mode and speed it up in post. Make sure to shoot in 4k, so that you don’t loose quality at the stabilisation.
Set waypoints
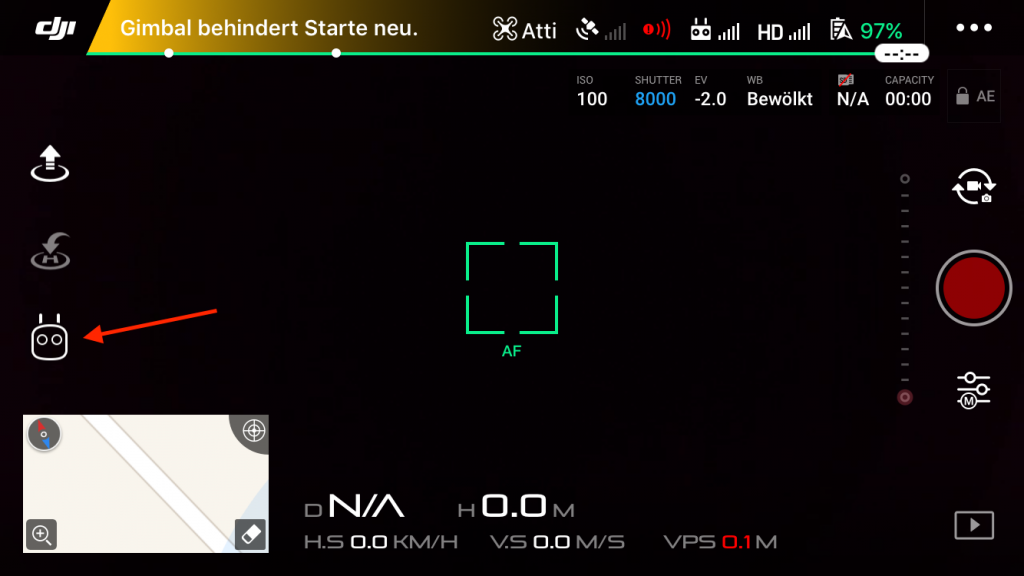
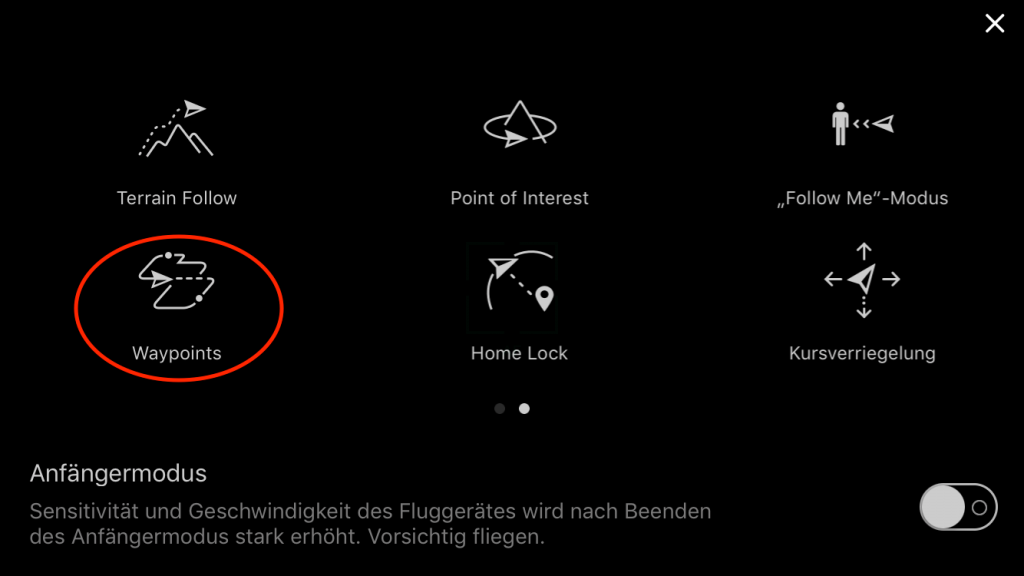
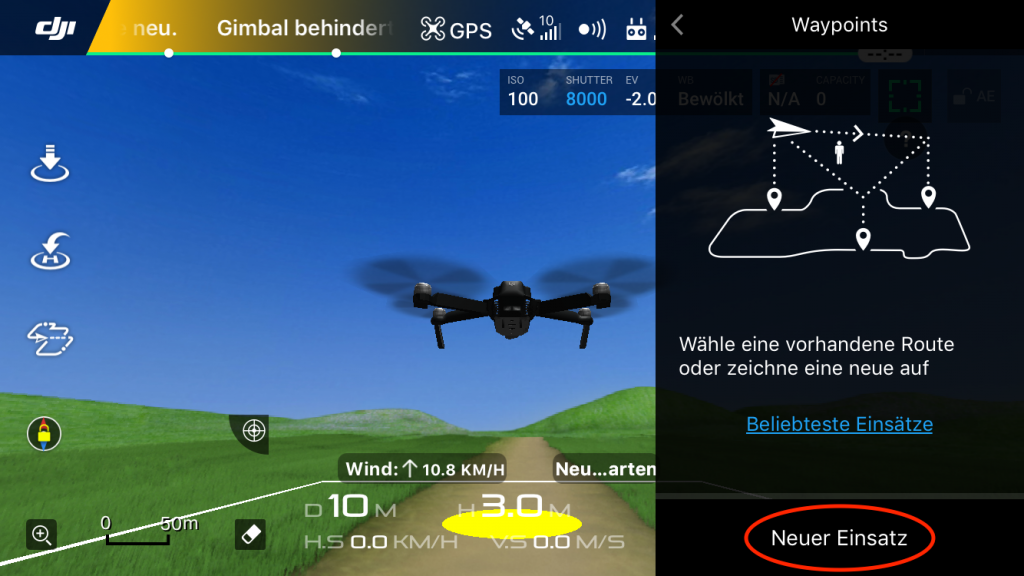
I am now showing you how to set up the waypoints in the DJI go app. Get your drone in the air and then go to the flightmode menu. Search for the “waypoint” mode. (second site)
Get to the starting point
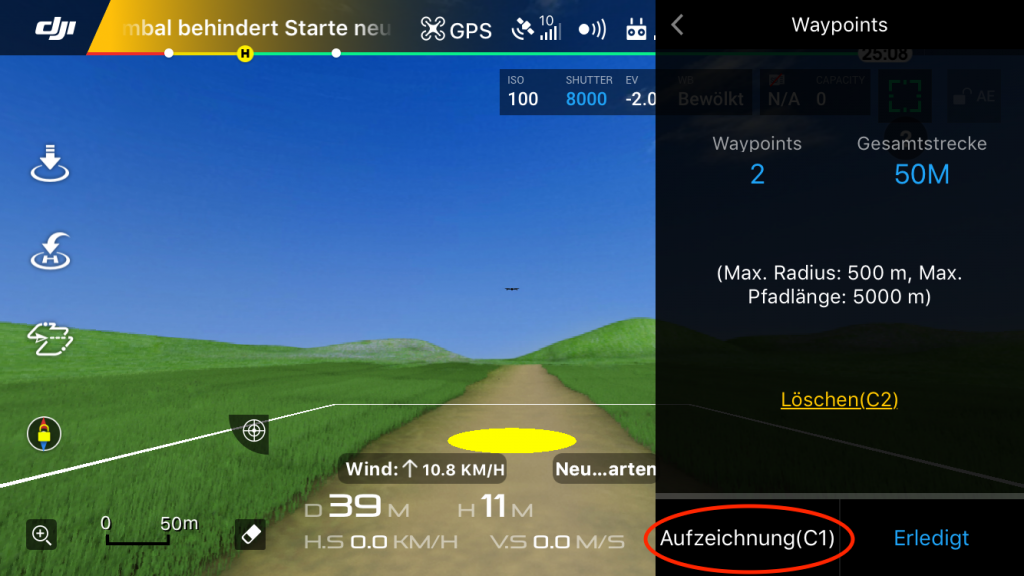
Move the drone to the starting position and press the C1 key or “set” at your smartphone. Move to the target point and press set again. Now move back to your starting position.
Start the flight
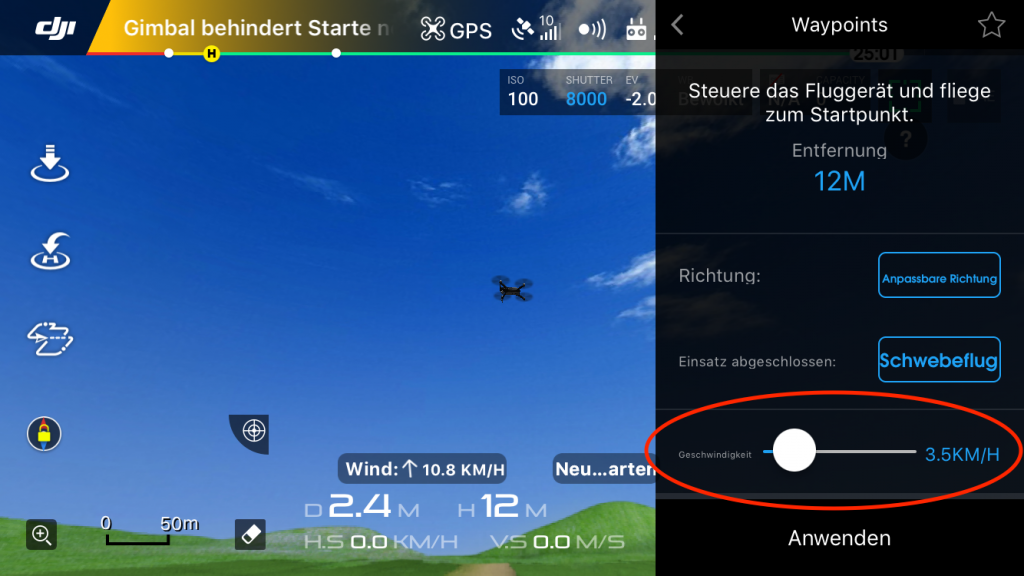
Now set the moving speed very low (2 mph). Start the previously set interval and then press “continue” in the waypoint menu. Rotate the drone to the direction you want the camera to look at and then keep away your fingers from the contoller during the flight. Keep the drone on sight, so that you won’t crash into an obstacle. Please also make sure to obey all legal regulations with your flight.
You can rent the mavic in my rental (Germany)!
2. Convert the pictures to a film
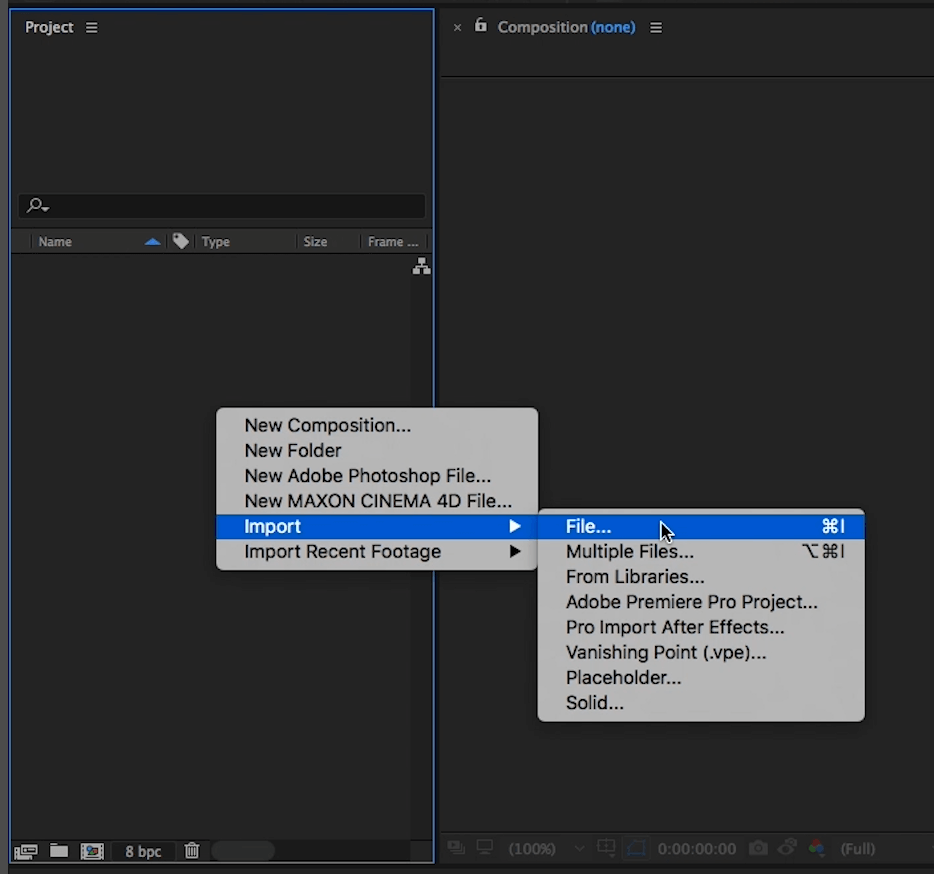
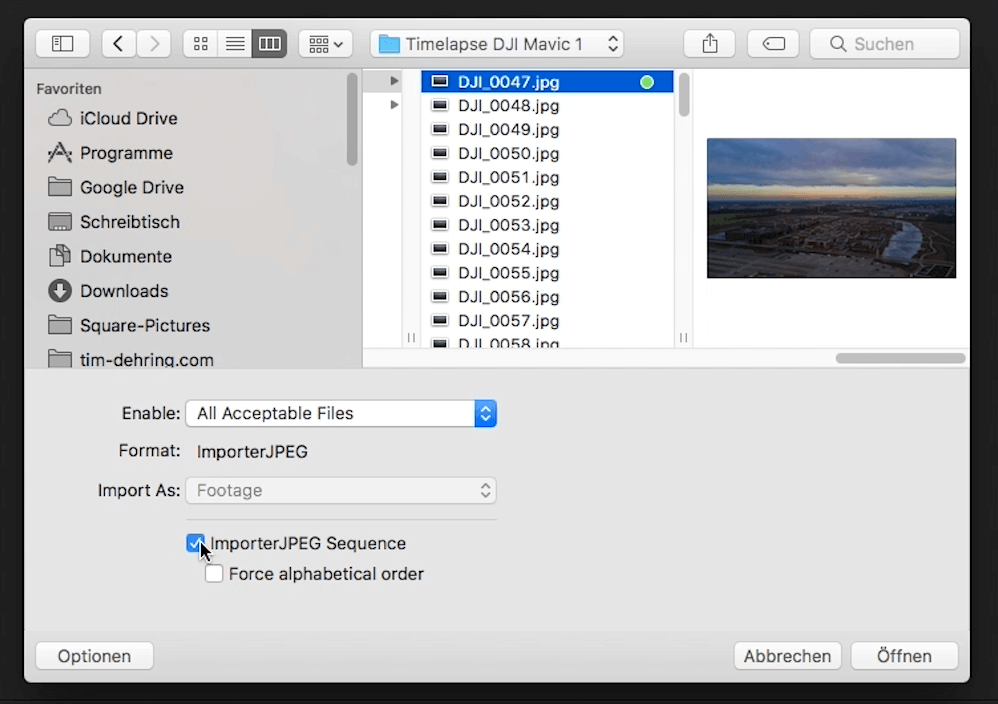
After having shot the dronelapse, you may have many pictures that first must be assembled to a film . You can easily do that in Adobe Premiere Pro or Adobe After Effects. I recommend After Effects because I also do the subsequent stabilisation there. If you shoot DNG files you should develop it in lightroom first and then export the highres jpegs. Create a new project in AE and then right click in the project window and select “import”. Now choose the first picture of your dronelapse and select “image sequence” in the options. Now you have an image sequence.
3. Stabilise the dronelapse
Now you can add the imported image sequence in a 1080p sequence. After that you can try the warp stabilisation – I recommend the “positon and scale” stabilisation method. Try to adapt the smoothness. If you’re not satisfied with the result, go ahead with the tracker stabilisation.
After Effects Tracker
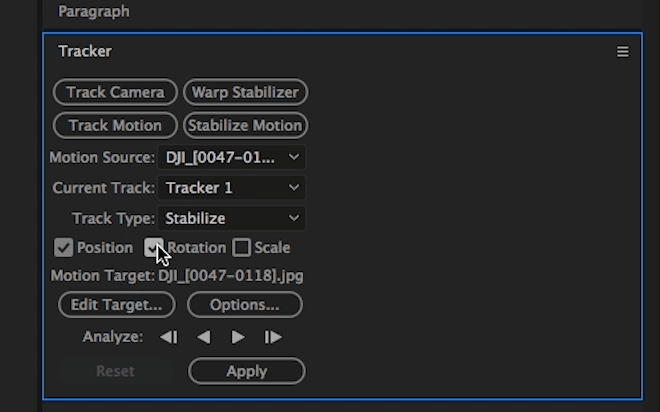
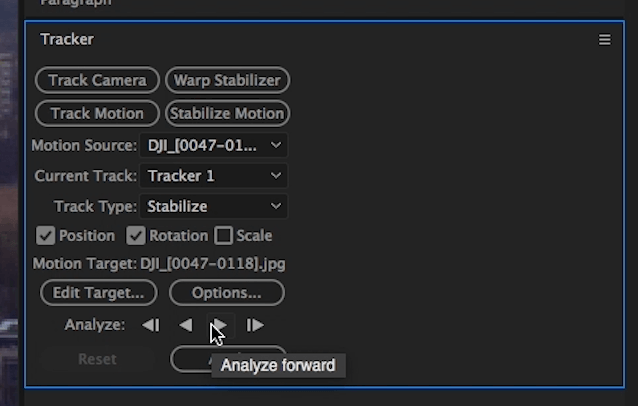
For a better stabilisation try the tracker. Go to the beginning of your sequence and open the “tracker” under “window”. Select “stabilize motion” and activate “position” and “rotation”.
Set tracking points
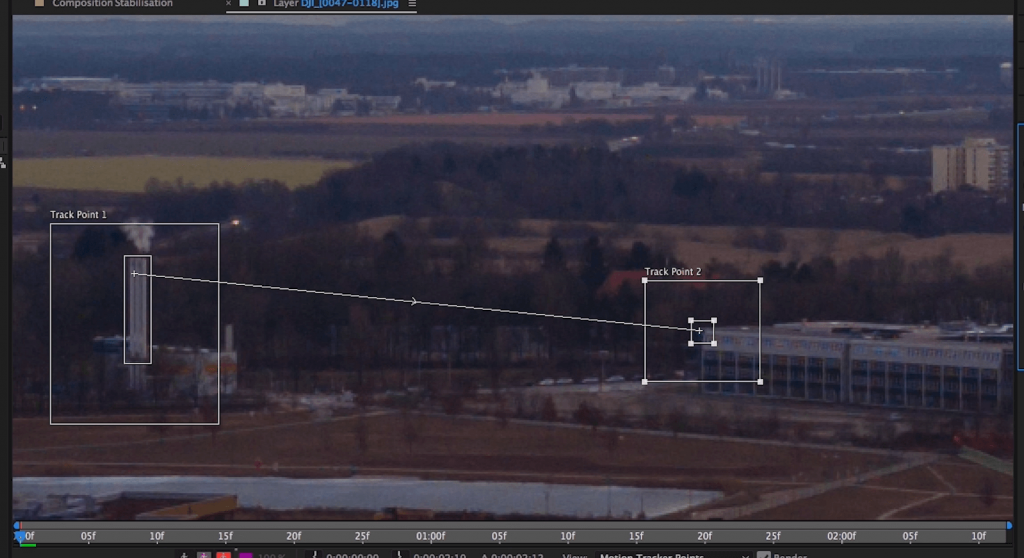
In the source window you can see two tracking points, which you have to position. The inner frame marks the pattern that should be tracked. The outer frame shows within which area the pattern should be searched, frame by frame. Trackpoint one is for position and number two for the rotation.
For the first track point look for a center area that withdraws well from the background and mark this with the inner frame. For the second tracker, now search an area which is close to the center, too, and which is horizontally on the same level as the first tracker. The two trackers should have some spacing between each other.
Start tracking
Press the “Analyze forward” button in the tracker window. If the tracker fails, press stop and then reposition the tracker and continue with the tracking.
Apply Tracker
When you finished tracking, press “apply” and than “X and Y” in the tracker window. It may happen that the result is not perfect yet.
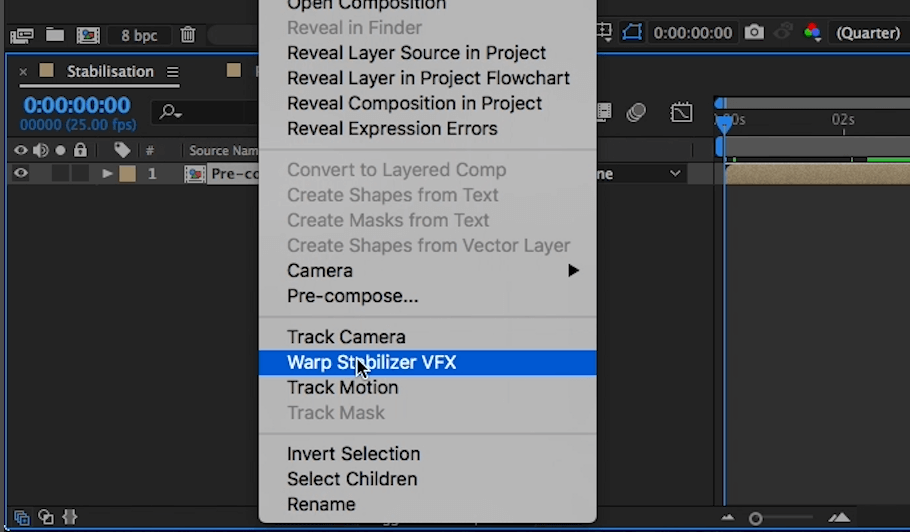
For a better result you could apply the warpstabiliser. Right click your sequence in the timeline and select “pre- compose”. Right click again and select “warp statbiliser”
Finishing process with warp stabiliser
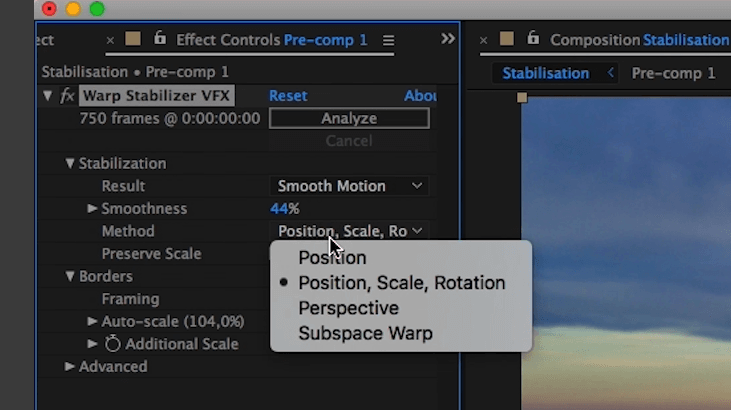
Now adapt the options of the warp stabiliser. Under “method”, select “position, scale and rotation”. Then press “analyze”. Try different parameters of the “smoothness” until you are satisfied.
Now your dronelapse should be completed. Should you have any questions, just leave a comment below.
Did this tutorial helped you?
Like my Facebookpage and never miss new tutorials and tricks!

